Advanced Workflow Builder Guide: Build Parallel Automations in HighLevel (GHL)
Master the HighLevel Advanced Workflow Builder with our guide to horizontal, node-based automation. Learn to build parallel branches, modular action groups, and scalable CRM workflows to optimize your agency's efficiency. Build smarter, faster automations today.

The Advanced Workflow Builder in HighLevel (also called GoHighLevel or GHL) upgrades how agencies and marketers design automations. It replaces the standard top-down canvas with a horizontal, node-based environment that makes complex automation logic easier to visualize, maintain, and scale. This guide explains what the Advanced Builder does, how it differs from the standard builder, step-by-step instructions for common tasks, best practices for agency setups, and troubleshooting tips.
What is the Advanced Workflow Builder and who should use it?
The Advanced Workflow Builder is a visual automation editor inside HighLevel designed for multi-step automations, parallel processes, and modular workflow design. It is ideal for:
- Marketing agencies building client funnels, lead routing, and multi-channel campaigns.
- Small businesses that need different branches for onboarding, sales follow-up, and retention running from the same automation.
- Operations teams requiring clear, maintainable automations in a CRM-driven environment.
Key benefits include a horizontal canvas, node-based connections, parallel workflows, delinked nodes (separate branches), and bulk copying/pasting of actions. These features let you build powerful CRM automations with less clutter and more flexibility.
Core concepts and terminology
Nodes
Nodes are the visual blocks on the canvas representing triggers and actions. Each node type has a specific connection behavior:
- Trigger nodes start a workflow. They accept connections only on their right side.
- Action nodes perform tasks (send email, add tag, create task). They connect on both sides so they can be placed in sequence or re-used in different branches.
Connections
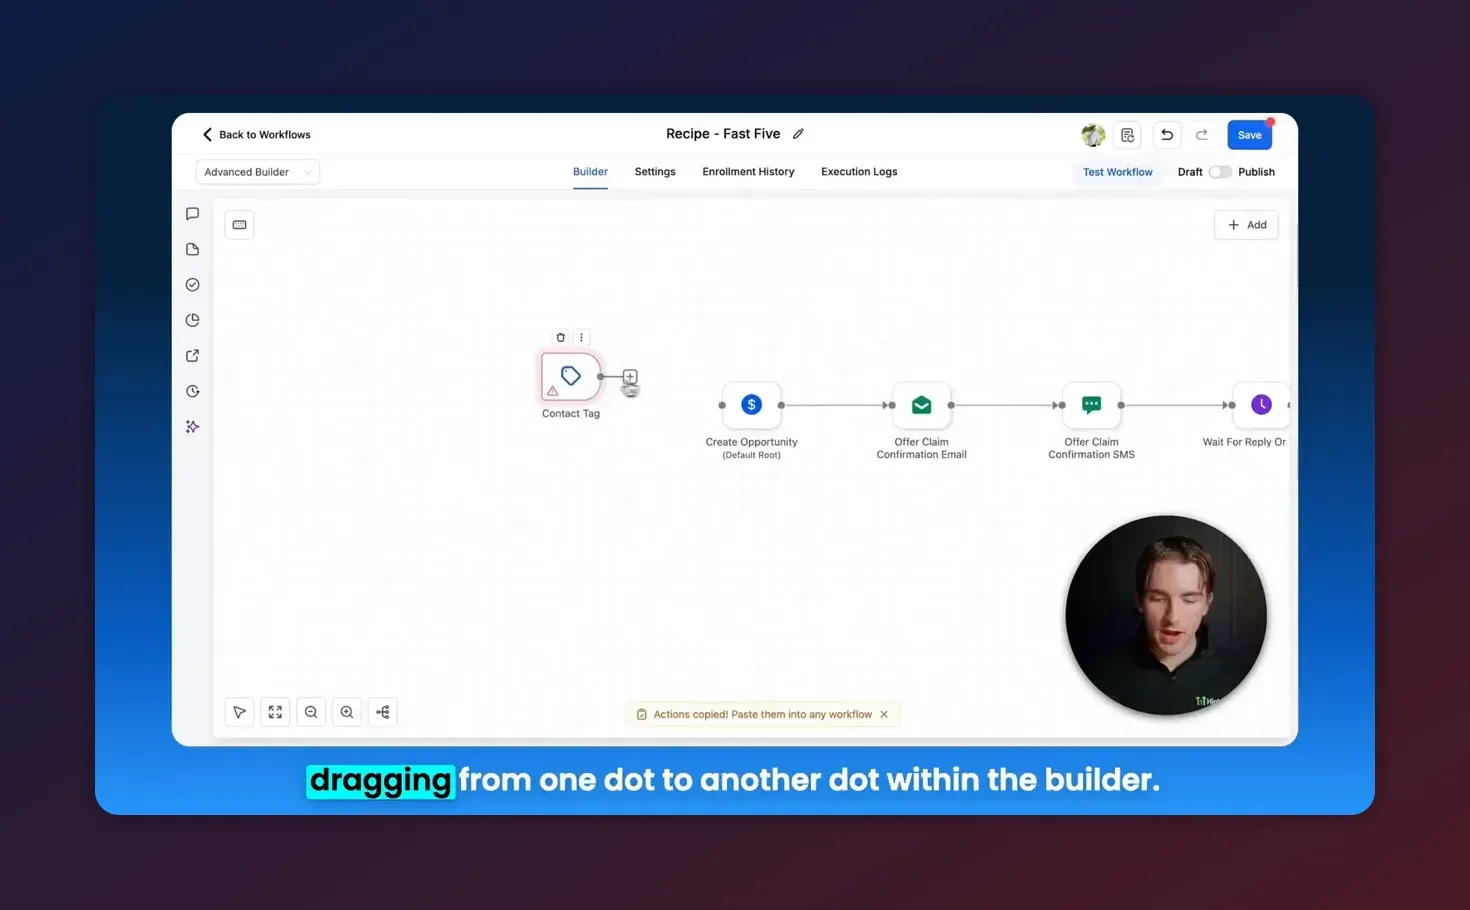
Lines and arrows connect nodes so automation can flow from left to right. Connections can be created by dragging from one node dot to another. Deleting a connection removes only the link, not the actions themselves, enabling parallel branches to exist within the same workflow.
Parallel workflows and delinked nodes
A parallel workflow happens when a trigger or action connects to two or more independent branches. Delinked nodes are branches that have been disconnected from the main line so they run separately. These features make it possible to run an onboarding sequence and a separate re-engagement sequence from the same automation.
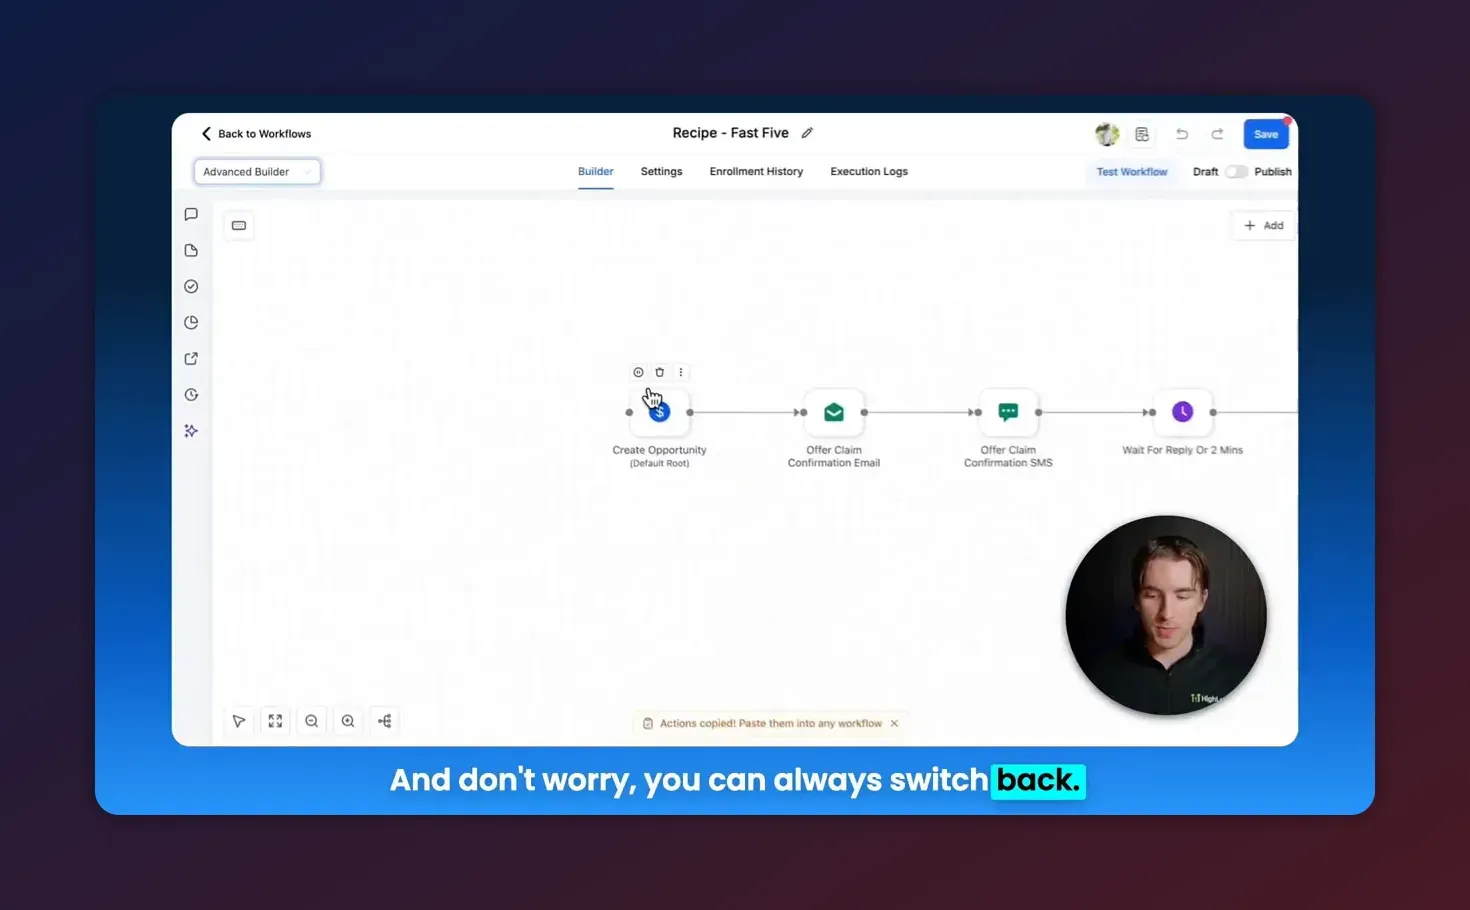
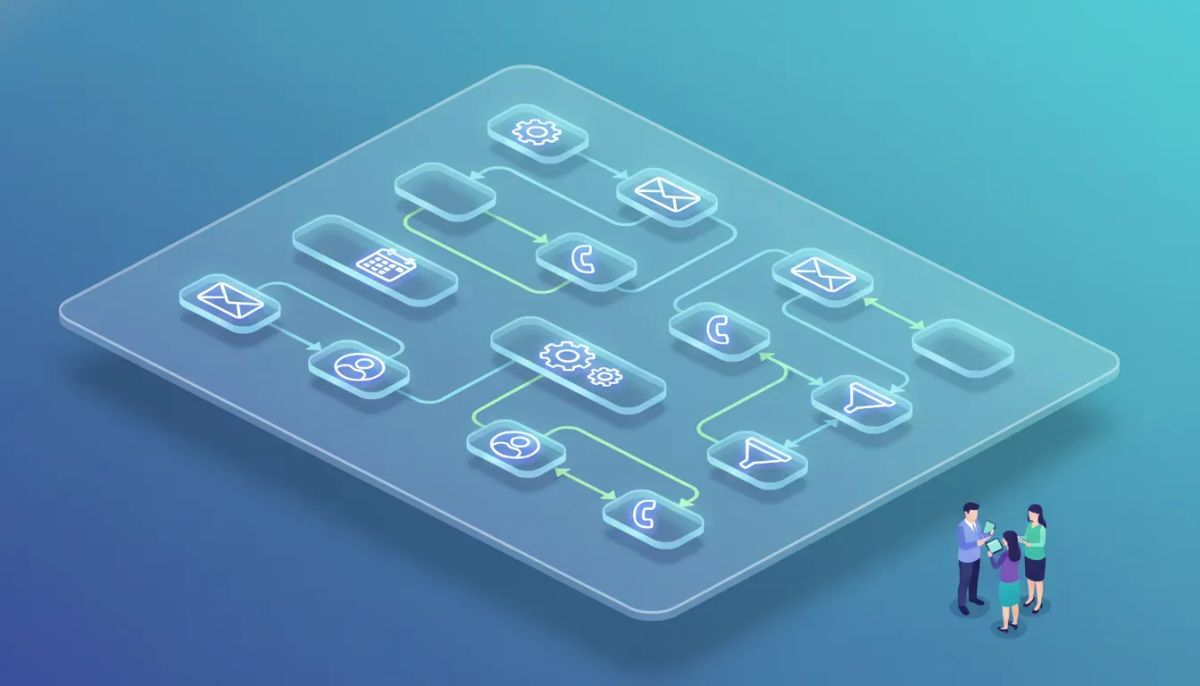
The Advanced Builder switches from the standard builder at the top-left of the automation editor and displays a horizontal canvas.
Step-by-step: Start using the Advanced Builder
- Switch to Advanced any automation in HighLevel. Use the builder selector at the top-left to switch from Standard Builder to Advanced Builder. You can switch back later unless your workflow uses features not supported by the standard builder.
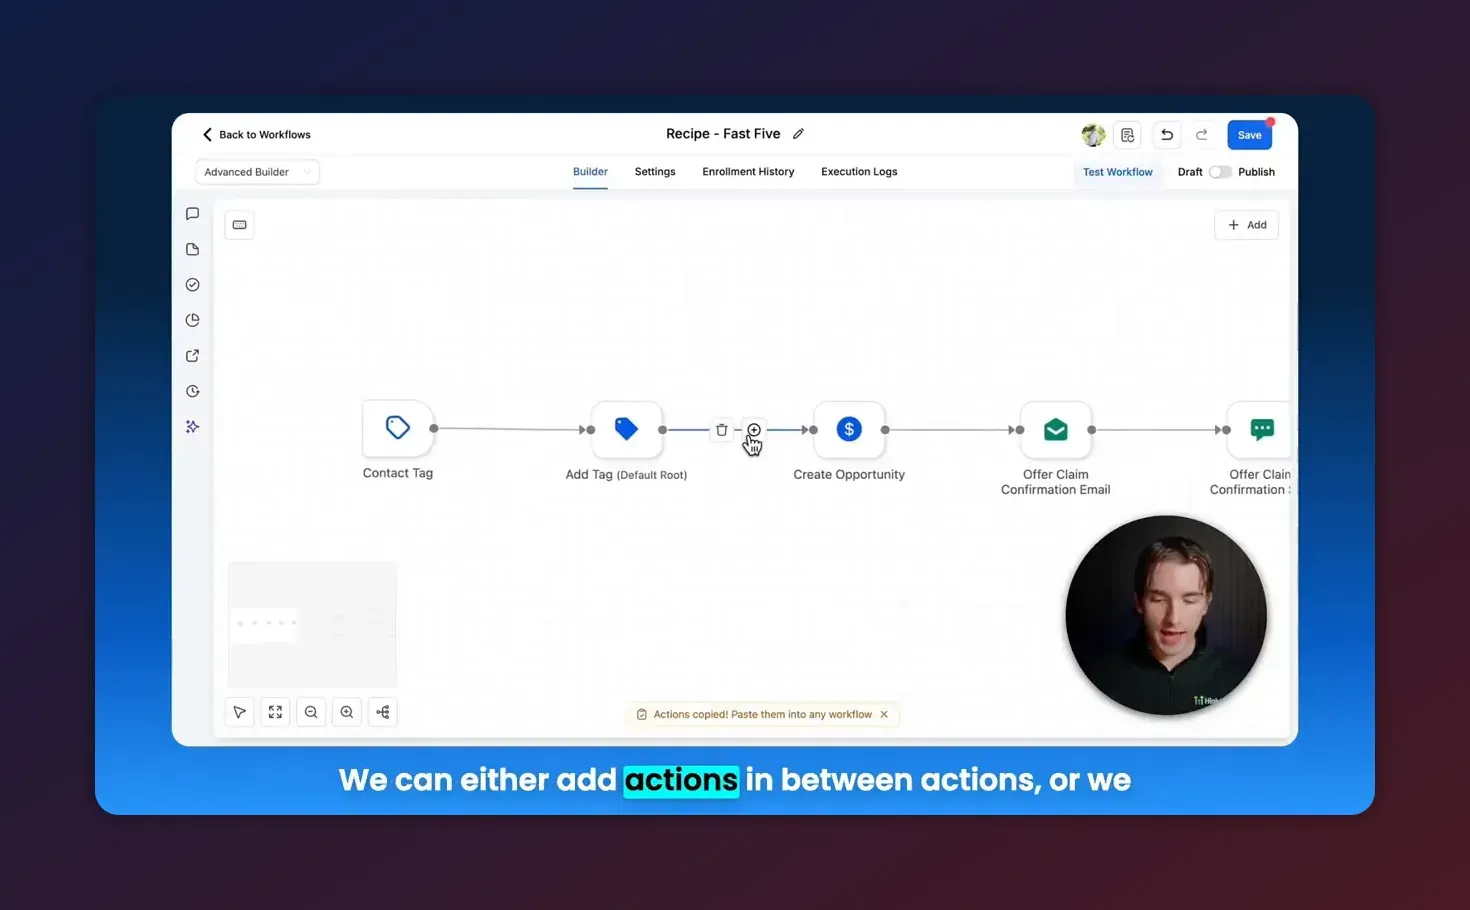
- Insert actions between any connection line and click the plus icon to choose an action to insert. This keeps your sequence tidy without manually re-wiring all nodes.
Reconnect if you need to switch back
If you want to return to the Standard Builder, reconnect any disconnected branches. The standard builder does not support parallel or delinked branches, so reconnection is required to revert.

Make parallel branches
Delete a connection to create separate branches or drag a node to connect the same node to multiple actions. Each branch runs independently, enabling parallel automation flows within a single workflow structure.

Create connections
Drag from a node’s dot to another node’s dot to create the connection line. Arrows indicate execution flow. Hover over lines and click the plus icon to insert a new action between existing nodes; the builder will push nodes aside and maintain layout organization.

Add and configure actions
Right-click or click Add > Add Action. Action nodes have connection dots on both left and right. Click a node to open the configuration pane where filters, messages, delays, and conditions can be set—just like in the standard builder.
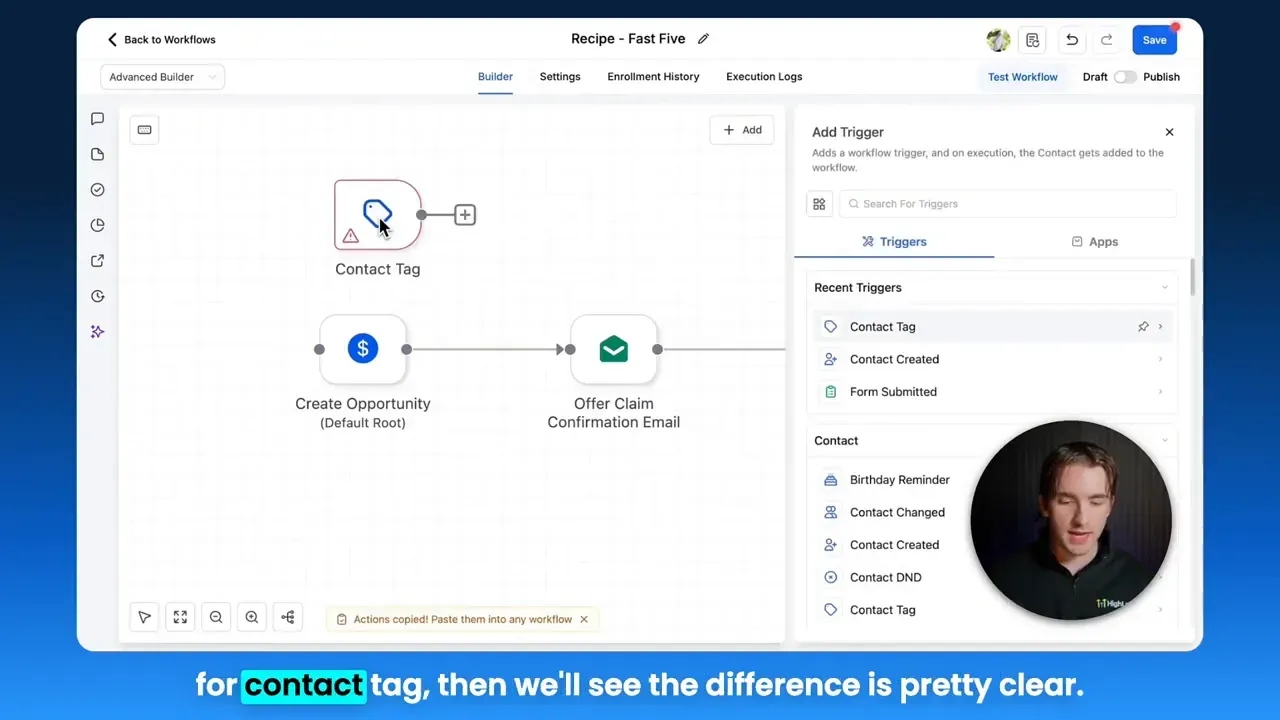
Add a trigger
Add > Add Trigger or right-click and choose Triggers. Select the trigger type (contact tag, form submission, pipeline stage, etc.). Only the right side of a trigger accepts outgoing connections.
Practical examples and use cases
1. Lead capture → Parallel workflows: Nurture + Qualification
Use a single form submission trigger. Create two parallel branches:
- Nurture branch: Immediate welcome SMS, follow-up email series over 30 days, weekly tag updates for content interest.
- Qualification branch: Run an internal scoring action, wait 2 days, if score > threshold, create a task for sales to call the lead.
Both branches run simultaneously after the one trigger, keeping the nurture flow independent from qualification actions.
2. Onboarding + Billing reminders from a signup trigger
From a signup trigger, run onboarding emails and internal task creation in one branch while a separate branch handles recurring billing reminders and failed payment alerts. Because branches are delinked, billing messages won't stop if onboarding is paused.
3. Multi-client agency templates
Build a master workflow with modular action nodes for common tasks (tagging, CRM updates, task creation). Copy and paste action groups in bulk to create client-specific variations quickly. This reduces setup time during client onboarding.
Best practices for building maintainable Advanced Builder automations
- Name nodes clearly
Use concise but descriptive titles like "Tag: New Lead - Webinar" or "Delay: 3 Days - Follow-up Email." Clear names make scanning large canvases faster. - Group related actions
Keep actions that belong to the same logical process close together and use consistent naming patterns for easy bulk copying. - Use comments or descriptive action text
where available to explain why a branch exists. This aids teammates when reviewing or editing automations. - Limit branch complexity
Parallel workflows are powerful but can become difficult to debug when there are many branches. If a workflow becomes unwieldy, consider breaking it into smaller, connected automations that communicate via tags or webhooks. - Test each branch independently
Use test contacts and trigger conditions to verify that each branch executes as expected before sending real messages. - Document decisions
Keep a simple runbook or template library (Nexus Hub can be used for templates) that explains the purpose and triggers for each complex workflow.
Common pitfalls and how to avoid them
Can't switch back to Standard Builder
This typically happens when your workflow contains disconnected branches or parallel structures unsupported by the standard builder. To switch back:
Start Your HighLevel Trial + Get Instant Nexus Hub Access
Build, scale, and optimize your business with HighLevel. Start a free trial using this link to get automatic access to the Nexus Hub community, templates, and implementation resources.
Start Free Trial- Reconnect any separated branches or consolidate parallel nodes into a single linear flow.
- Confirm there are no unsupported nodes or configurations and attempt the switch again.
Unexpected duplicates or loops
Parallel branches can accidentally re-trigger the same actions if triggers or tags are not tightly controlled. Avoid loops by:
- Using filters on triggers and actions
- Setting tags or custom fields when actions run
- Adding checks before re-triggering (condition nodes or wait blocks)
Performance and maintenance overhead
Very large workflows with many parallel branches can be harder to maintain. If a workflow is slow to edit or visually cluttered:
- Break it into smaller automations that trigger each other
- Keep a central template library for repeated logic
Advanced tips and workflow design patterns
Use a router pattern
Create a central router node that evaluates contact data and then routes to separate branches for different outcomes (e.g., product interest, geographic region, service level). This centralizes decision logic and reduces duplicate setup.
Modular action groups
Build frequently used action sequences (welcome sequence, verification checks, billing reminders) as grouped nodes you can copy/paste into multiple workflows. HighLevel’s copy/paste in bulk speeds replication across clients.
Testing checklist before publishing
- Confirm trigger filters are correct
- Run the workflow with a test contact
- Check that parallel branches executed and completed expected actions
- Ensure tags and CRM updates are applied only once
- Verify error handling or re-try mechanisms are in place for external actions (like webhooks or API calls)
Dragging and repositioning nodes makes complex layouts more readable. Keep key triggers on the far left and actions flowing right.
Troubleshooting: Quick fixes for common issues
Workflow not firing
- Confirm trigger conditions match the contact data.
- Check that the trigger node is active and not paused.
- Look for filters that might block execution.
One branch runs, another does not
- Ensure the branch is connected to the trigger or to a node that fires.
- Verify any wait or delay nodes are not set to a future date accidentally.
- Check action permissions for external integrations (SMS, email, webhooks).
Messages sent multiple times
- Confirm that actions do not run in both branches for the same contact.
- Use tags or contact fields to mark that an action has been completed.
- Place checks before message actions to prevent repeats.
Hovering lines to insert actions keeps the flow neat and reduces manual rewiring.
How Advanced Builder fits into agency scaling and CRM workflows
For agencies running multiple clients on HighLevel, the Advanced Builder enables the creation of reusable templates and modular automation components. Instead of duplicating large linear workflows, build smaller, tested modules you can copy into client accounts. This reduces development time and improves consistency across client automations.
Use the Advanced Builder to standardize onboarding for new clients: build a master onboarding automation with parallel branches for technical setup, campaign creation, and client training tasks. Then duplicate and customize it per client.
When to keep using the Standard Builder
The Standard Builder remains a good choice for simple, linear automations where parallel branches or advanced node features are not needed. If you need a quick single-path welcome series or a simple tag-based trigger, the standard builder is faster and familiar. Switch to the Advanced Builder when you anticipate branching logic, parallel execution, or modular reuse.
Resources and next steps
- Start with a sandbox contact to test each branch before enabling the workflow for live leads.
- Create a small library of reusable action groups for common agency tasks.
- Document each complex automation in a runbook or client-facing onboarding guide.
- Consider joining HighLevel communities like Nexus Hub for templates and implementation support.
FAQ
Can I switch back to the Standard Builder after using Advanced Builder features?
Yes, but only if your workflow does not include unsupported elements like disconnected branches or parallel workflows. Reconnect any delinked branches and remove unsupported structures to revert to the standard builder.
What happens when I delete a connection line between nodes?
Deleting a connection removes the link but does not delete either node. This lets you create separate branches (delinked nodes) that run independently within the same workflow.
How do I insert an action between two existing actions?
Hover the connection line between the two actions and click the plus icon that appears. Choose the action to insert; the builder will place it and reorganize the layout automatically.
Can I copy and paste groups of actions?
Yes. The Advanced Builder supports copying and pasting workflow actions in bulk, which is useful for replicating sequences across workflows or client accounts.
Are parallel workflows suitable for all use cases?
Parallel workflows are ideal for independent processes that should run simultaneously, like nurture sequences vs internal qualification. However, if processes interact frequently or require complex synchronization, consider splitting into separate automations that communicate via tags or webhooks to reduce complexity.
Summary and recommended first automation
The Advanced Workflow Builder brings horizontal, node-based automation to HighLevel, enabling parallel branches, delinked nodes, modular action groups, and streamlined editing. For agencies and teams running multi-step client automations, these features improve clarity and reduce duplication.
Recommended first automation: create a single trigger for new leads and build two parallel branches—one for nurture (email + SMS) and one for internal qualification (scoring + tasks). Test with sandbox contacts, document the flow, then reuse the pattern as a template for client onboarding.
To accelerate implementation, consider starting a free HighLevel trial to experiment in a sandbox account and explore template libraries like Nexus Hub for reusable components.
Start Your HighLevel Trial + Get Instant Nexus Hub Access
Build, scale, and optimize your business with HighLevel. Start a free trial using this link to get automatic access to the Nexus Hub community, templates, and implementation resources.
Start Free Trial