How to Filter Media by File Type in HighLevel

As your HighLevel account grows, your media library usually grows right along with it.
What starts as a small collection of images and a few documents can quickly turn into a packed Media Storage area filled with photos, videos, audio clips, PDFs, and miscellaneous assets for funnels, emails, websites, and social content. That is great for productivity, but it can also make it harder to find the exact file you need when you need it fast.
The good news is that HighLevel includes a simple file type filter inside the Media Center that makes this much easier. Instead of scrolling through everything in your library, you can narrow the view to only the type of asset you want. A few clicks can save a surprising amount of time, especially for agencies, marketers, and teams managing a high volume of client assets inside GHL.
If you use HighLevel for CRM, marketing automation, SaaS operations, or agency delivery, this is one of those small features that can improve your day-to-day workflow immediately.
The Complete Operating System for Growth
Join over 60,000+ agencies and businesses using HighLevel to capture more leads and close more deals. Start your trial today and get instant access to the Nexus Hub resources.
Claim Your Free Trial & BonusesWhy file filtering matters in HighLevel
Media management is one of those things that often gets overlooked until the library becomes crowded.
In the beginning, finding a file is easy because there are only a handful of uploads. But once you are actively building pages, launching automations, sending campaigns, and managing content across multiple assets, your media library can become a mixed collection of:
- Brand images
- Video content
- Audio files
- Documents and downloadable resources
- Other miscellaneous file types
When all of those appear in one view, browsing manually takes more time than it should. The file type filter solves that problem by helping you narrow the list instantly.
That means less searching, less clutter, and a smoother experience when you are building inside HighLevel.
What the file type filter does
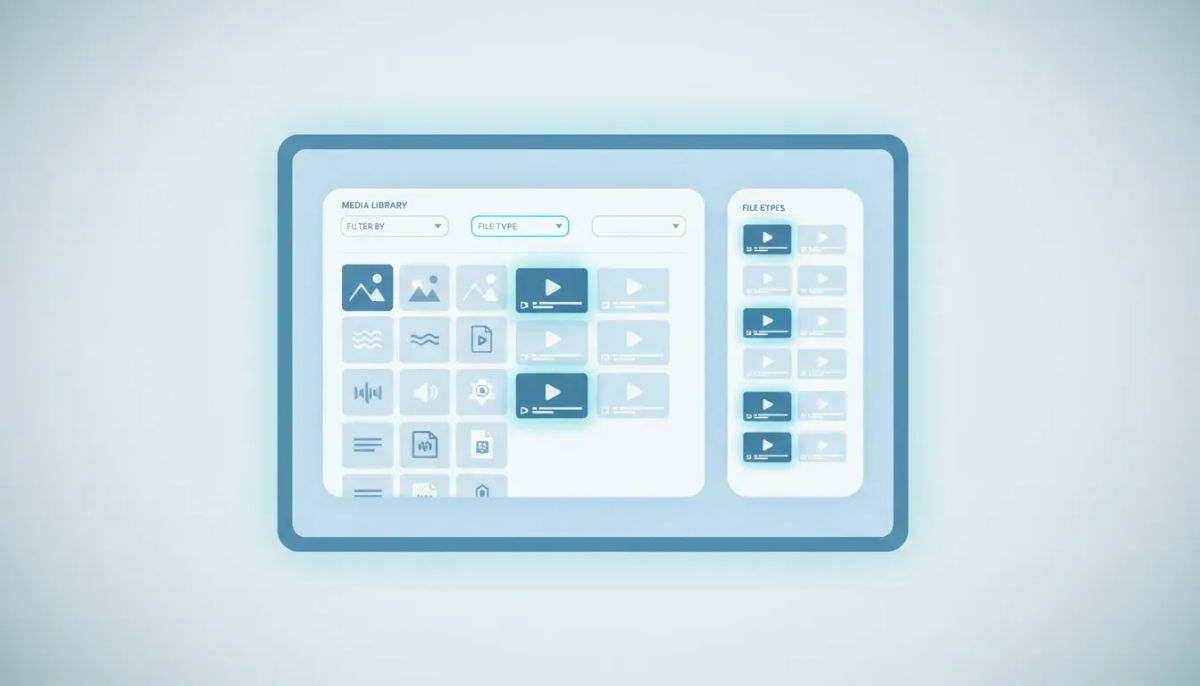
The file type filter in HighLevel Media Storage changes what is displayed in your media library. It helps you focus on one category of files at a time.
You can filter your assets by:
- Photos
- Videos
- Audio
- Documents
- Other
This is especially useful when you know the kind of file you are looking for, but you do not want to hunt through unrelated items to find it.
For example, if you only need an image for a funnel section or website header, switching the filter to photos removes everything else from view. If you need a training clip or promotional content, filtering by video shows only the video assets in your library.
It is a simple feature, but in a busy GHL account, simple can be powerful.
Where to find the filter in HighLevel
The filter is located inside the Media Storage area of your HighLevel sub-account.
Here is the path:
- Open your HighLevel sub-account.
- Go to Media Storage from the bottom left-hand side.
- Make sure you are inside My Media.
- Look to the right-hand side for the dropdown that says All.
- Use that dropdown to choose the file type you want to display.
That is the full process. No extra setup is required.
If your assets are already uploaded, you can start filtering right away.
Step-by-step: how to use the file type filter
1. Open Media Storage
Inside your sub-account, navigate to the Media Storage section from the left-side menu. This is where your uploaded assets live and where you can manage the files used across different parts of your HighLevel system.
If you work across multiple clients or sub-accounts, make sure you are in the correct account before searching for assets.
2. Select My Media
Once you are in Media Storage, confirm that you are viewing My Media. This section shows the assets you have uploaded to that media library.
If you skip this step or look in the wrong area, you may think a file is missing when it is really just outside the current view.
3. Click the All dropdown
On the right-hand side, you will see a filter currently set to All. This means every supported file type in your media library is being shown together.
Clicking that dropdown gives you the option to sort the visible assets by category.
4. Choose the file type you need
Select the category that matches the asset you are trying to find.
- Choose Photos to display only image files.
- Choose Videos to show only video assets.
- Choose Audio for sound files.
- Choose Documents for files like PDFs and other document-based uploads.
- Choose Other for anything that does not fall into the main categories.
As soon as you select a filter, the library updates to show only that file type.
5. Locate the asset faster
With unrelated files hidden from the current view, it becomes much quicker to identify the asset you need.
This can be particularly helpful when you are actively building or editing and do not want to lose momentum searching through a crowded media library.
Important note: filtering does not change your storage
This is the key thing to remember.
The file type filter only changes what you see. It does not delete, move, reorganize, or modify the actual files in your Media Storage.
In other words:
- Your assets remain stored exactly where they are
- The filter only narrows the visible list
- Switching filters is completely safe
- You can return to All at any time to see the full library again
That matters because people often worry that filtering is the same as changing a folder structure or affecting storage. In this case, it is just a display tool designed for faster navigation.
When this feature is most useful
The file type filter becomes even more valuable as your HighLevel usage expands.
Here are some common situations where it helps:
Building funnels
If you are designing pages and need a specific image or embedded video, filtering by photos or videos helps you find the right media without scrolling past unrelated documents or audio files.
Creating email campaigns
When inserting media into email content, speed matters. Filtering your library keeps the selection process cleaner and reduces distractions.
Managing website assets
Websites often require a mix of banners, icons, supporting graphics, and downloadable resources. File type filtering lets you focus on one type of asset at a time.
Organizing social content
If your social scheduling workflow includes image posts, video content, and downloadable materials, a filtered media view can make content assembly much more efficient.
Running agency systems at scale
For agencies using GoHighLevel to manage multiple clients, even small time savings add up. Faster file discovery supports smoother delivery, cleaner internal processes, and less friction for team members handling implementation.
The Complete Operating System for Growth
Join over 60,000+ agencies and businesses using HighLevel to capture more leads and close more deals. Start your trial today and get instant access to the Nexus Hub resources.
Claim Your Free Trial & BonusesHow this supports better HighLevel workflows
Even though this is a Media Storage feature, it connects naturally to broader HighLevel workflows and automations.
Why? Because media assets power so many parts of the platform.
Your files may be used in:
- Funnels and landing pages
- Email marketing assets
- Website content
- Social publishing
- Downloadable lead magnets
- Sales and nurture campaigns
Whenever your build process depends on locating the right file quickly, an organized media experience helps you move faster.
For agencies focused on scaling, these practical efficiencies matter. Good agency setup is not only about advanced automation or CRM configuration. It also comes from reducing friction in the small tasks your team repeats every day.
That is where features like this quietly improve operations.
Best practices for working with a larger media library
The file type filter is already useful on its own, but it becomes even more effective when paired with clean media habits.
Within the limits of your existing HighLevel process, here are a few simple best practices to keep in mind:
- Know the file type before searching. If you are looking for an image, switch to photos first instead of searching through all file categories.
- Use My Media consistently. Make sure you are working from the right section so uploaded assets are easier to find.
- Filter first, browse second. Narrowing the list before scrolling saves time and reduces mistakes.
- Return to All when needed. If you are unsure what type of file you uploaded, switch back to the full library view.
- Use filtering as part of your build routine. When adding media to funnels, websites, or email campaigns, make filtering a standard first step.
These are small workflow improvements, but in a platform as active as GHL, small improvements often create the biggest long-term gains.
Why this matters for agencies and teams
If you are a solo user, filtering by file type is a convenience.
If you are an agency, it is also an operational advantage.
Agencies working inside HighLevel often manage:
- Multiple brands
- Large content libraries
- Repeated campaign builds
- Team handoffs
- Ongoing client updates
In that kind of environment, easy asset discovery supports better execution. It reduces the time spent hunting for files, helps keep implementation moving, and makes the platform feel cleaner and more manageable for everyone involved.
When your systems are built for speed, service delivery becomes easier to scale. That is true whether you are handling marketing automation, CRM operations, client onboarding, or SaaS fulfillment through HighLevel.
A small feature that improves everyday efficiency
Not every productivity improvement needs to be complex.
Sometimes the biggest boost comes from using built-in tools more intentionally. The file type filter in HighLevel Media Center is a perfect example. It is simple, fast, and immediately helpful, especially when your media library starts getting crowded.
Instead of wasting time scrolling through every asset in your account, you can quickly narrow your library to the type of file you need and keep moving.
That is exactly the kind of practical feature that supports better day-to-day execution inside HighLevel.
FAQ
Where is the file type filter located in HighLevel?
The file type filter is located in your HighLevel sub-account inside Media Storage. After opening My Media, look on the right-hand side for the dropdown labeled All.
What file types can I filter by in the Media Center?
You can filter by Photos, Videos, Audio, Documents, and Other. These options help you narrow the visible assets in your media library.
Does filtering by file type delete or move my files?
No. The filter only changes what is displayed on the screen. It does not affect your storage, move files, or change how assets are saved in HighLevel.
Why should I use the file type filter in GoHighLevel?
It helps you find assets faster, especially in larger media libraries. This is useful when working on funnels, emails, websites, documents, and social content where speed and organization matter.
Do I need to set up anything before using this feature?
No extra setup is required. As long as your files are already uploaded to Media Storage, you can use the filter immediately from the All dropdown in My Media.
Is this useful for agencies using HighLevel at scale?
Yes. For agencies managing multiple clients and larger asset libraries, filtering by file type can save time and reduce friction during implementation, campaign builds, and ongoing account management.
Final takeaway
If your Media Storage is starting to feel crowded, this is one of the easiest ways to clean up your workflow without changing anything about your actual file storage.
Open Media Storage, go to My Media, click the All dropdown, and filter by the type of asset you need. That one habit can make your HighLevel media library much easier to navigate.
If you are still building out your systems, it may be a good time to start a HighLevel free trial and get familiar with features like this early. And if you want extra support, templates, and implementation help as you grow, joining the Nexus Hub community can be a practical next step.
Efficient media management may seem small, but in a platform built for marketing automation, CRM execution, and agency scale, small efficiencies create better systems.
The Complete Operating System for Growth
Join over 60,000+ agencies and businesses using HighLevel to capture more leads and close more deals. Start your trial today and get instant access to the Nexus Hub resources.
Claim Your Free Trial & Bonuses