How to Create One Click Upsells in HighLevel Funnels


If you're selling online, you should care about one thing beyond just getting the sale: increasing average order value.
That is exactly where one click upsells in HighLevel funnels come in.
Whether you're selling digital products, online courses, coaching, services, or even physical products, adding an upsell after the initial purchase is one of the simplest ways to generate more revenue from the same traffic. And the logic is straightforward. Every buyer reaches the next step after checkout, so instead of sending them straight to a plain thank you page, you can place a relevant offer right there and let them accept it with a single click.
HighLevel now makes this easier by allowing you to build the initial checkout inside the Forms builder, while still generating the payment token needed for a true one-click upsell. That means customers enter their payment details once, and if they want the additional offer, they do not need to fill everything out all over again.
That convenience is a big part of why upsells convert so well.
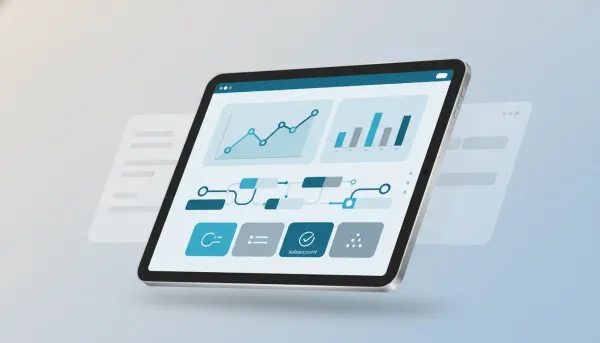
The Complete Operating System for Growth
Join over 60,000+ agencies and businesses using HighLevel to capture more leads and close more deals. Start your trial today and get instant access to the Nexus Hub resources.
Claim Your Free Trial & BonusesWhy one click upsells matter in HighLevel
Most funnels focus heavily on the front-end offer. That matters, of course, but many businesses leave money on the table by stopping at the initial purchase.
A well-placed upsell can help you:
- Increase average order value without increasing ad spend
- Monetize warm buyers at the moment they are most engaged
- Improve funnel efficiency by getting more value from the same traffic
- Create smarter product ladders using complementary offers
In HighLevel, this becomes especially powerful because your funnel pages, products, payments, CRM, and automations all live in the same ecosystem. That means your checkout flow is not isolated. It can connect directly into your agency systems, customer records, workflows, and post-purchase marketing automation.
For agencies using GoHighLevel to scale client offers, this is a practical feature, not just a nice one. A better checkout experience leads to better conversion data, stronger retention strategies, and more profitable funnel builds.
What makes this setup different
HighLevel has already offered one-step and two-step order forms inside funnels. The useful shift here is that you can now build the sale directly inside Forms using the Sell Product element, then place that form inside a V2 funnel.
The key benefit is this:
The form collects payment details and creates the token required for one-click upsells.
That token is what allows the next page to offer another product without asking the buyer to re-enter payment info. So the setup is still smooth for the customer, but more flexible for you as the funnel builder.
Step 1: Build the checkout form in HighLevel Forms
Start by going into the Form Builder and creating a new form from scratch.
Inside the form editor, add the Sell Product element from the left-hand side. This is the part that turns a normal form into a checkout form, because it allows you to collect payment information directly.
For the customer details, keep the basics at the top of the form:
- First name
- Last name
- Phone number
That gives you the contact information you need while also creating a clean checkout flow.
You will also notice the mandatory checkout elements such as terms and conditions fields. HighLevel includes these so you can update the text and names as needed for your business.
Why the Sell Product element is so important
This element does more than just process a payment. It creates the token that powers the one-click upsell later in the funnel.
That is the whole game here.
The buyer fills out payment information once during the initial sale. On the upsell page, they simply click a button to accept the additional offer. No repeated form filling. No added friction. No unnecessary drop-off.
Step 2: Configure the product inside the form
Once the Sell Product element is selected, head to the settings on the right-hand side.
There, HighLevel gives you several options to configure how the payment works.
Choose test mode or live mode
You can toggle between test mode and live mode. If you are building and checking your flow, test mode is useful. When you are ready to take real payments, switch to live mode.
Select the payment type
You will see payment options such as:
- Sell products
- Collect payments
For a standard funnel checkout tied to an existing product, choose Sell products.
Select the product
Products need to be created ahead of time under Payments > Products. Once your products exist there, they will appear in the dropdown inside the form builder.
Select the product you want to sell as the initial offer.
HighLevel also gives you a shortcut link that sends you directly to the product section if you need to create a new one first.
Main product vs bump product
When adding the product to the form, you can designate it as either:
- Main product
- Bump product
The difference is simple:
- The main product is the core thing your landing page is selling.
- The bump product is a smaller add-on attached to the checkout experience.
For the initial offer, choose main product.
Product display settings
You can choose to display product details such as:
- Description
- Image
- Available quantity
This product display is connected to your inventory count. That matters especially if you are selling physical products or limited quantities. If inventory runs out, the upsell will not function for that out-of-stock item.
Coupons and final form settings
If you want to offer a discount code, you can enable coupons directly within the form settings.
Once everything looks right, rename the form clearly and save it.
At this point, you have the checkout component that will collect payment and create the upsell token.
Step 3: Add the form to a HighLevel V2 funnel
Now it is time to place the form inside your funnel.
Go to Sites > Funnels, create a new funnel, and choose a template if you want a faster starting point. Then open the page where you want your checkout to appear.
Inside the funnel builder, add a new element and scroll to the Forms section. There you can drag in the form element you just created.
Search for the form by name, select it, and HighLevel will load the order form directly into the page.
You should now see all the checkout details appear, including:
- Customer info fields
- Product name
- Quantity
- Card payment section
- Required checkboxes
Important: this setup works in V2 funnels only. It does not work in V1 funnels.
Step 4: Configure the checkout button correctly
On the form, the button action matters.
You will usually have options like:
- Go to next step
- Go to website URL
For this flow, set the button to Go to next step.
That keeps the process clean and prevents unnecessary confusion. You could use a direct URL, but then you would need to manually manage the destination and make sure everything lines up correctly.
Keep the upsell on the same domain
This is one of the biggest implementation details to get right.
Use the upsell on the same domain as the initial checkout.
The token created during the form checkout needs to carry over to the next page. If you move the buyer to a different domain, that token will not transfer properly, and the one-click upsell will fail.
For agencies managing multiple brands or client subaccounts in HighLevel, this is an easy detail to overlook. Keep the whole purchase path on one domain and you avoid the headache.
The Complete Operating System for Growth
Join over 60,000+ agencies and businesses using HighLevel to capture more leads and close more deals. Start your trial today and get instant access to the Nexus Hub resources.
Claim Your Free Trial & BonusesStep 5: Add an upsell step to the funnel
After the checkout page, create a new funnel step and name it something like Upsell.
Drag that step so it sits between your landing or checkout page and the final thank you page.
This upsell page can include whatever helps sell the additional offer, such as:
- A headline
- Bullets explaining the value
- Testimonials
- A short video
- A button to accept the upsell
The content itself is flexible. The technical part is what matters next: attaching the upsell product and linking the button correctly.
Step 6: Attach the upsell product to the funnel step
The original offer was connected inside the form. The upsell product must now be attached to the upsell page in the funnel.
To do that:
- Open the upsell step settings
- Go to Products
- Click Add Product
- Select the upsell product from your product list
- Choose the price
The product name generally pulls in from the product description you created earlier, and HighLevel lets you override the display name if needed.
You can also set whether the item is treated as a main or bump product under additional options, though for this use case the key thing is simply attaching the correct product to the upsell step.
Save it, and now the funnel step knows which product it should sell.
Step 7: Turn the upsell button into a one click offer
This is where everything comes together.
Open the upsell page in the funnel editor and add your button. Then select the button and go into the settings on the right-hand side.
For the button action, choose:
One-click up or downsell product
Then select the product you attached to the funnel step.
After that, choose what happens next. HighLevel gives you options such as:
- Go to next step
- Go to URL
- Select a custom step
The cleanest option is usually to send the customer to the thank you page after they accept the upsell.
Once you save, the button now acts as a real one-click upsell. If the customer accepts, the previously created payment token is used to process the purchase without forcing them through checkout again.
Step 8: Add order confirmation to the thank you page
Your thank you page does not need to be static. In HighLevel, you can drop in an Order Confirmation element so customers can see exactly what they purchased.
To do that, edit the thank you page and add the Order Confirmation element from the builder.
This element lists purchased items individually, including:
- Main products
- Upsells
- Bump offers
That gives the customer a cleaner post-purchase experience and reduces confusion, especially if they accepted one or more additional offers along the way.
You can chain multiple upsells
HighLevel does not limit you to a single upsell page.
Each funnel step supports one upsell product, so if you want a multi-step sequence, you can create multiple upsell steps and chain them together.
That means your funnel can look something like this:
- Initial checkout form
- Upsell 1
- Upsell 2
- Thank you page
This can be useful when you have a natural product ladder, such as:
- Main course
- Private support add-on
- Advanced implementation offer
The key is relevance. The upsell should feel like a logical next step, not a random extra.
Use HighLevel automations to follow up intelligently
If you are already using HighLevel workflows and automations, the post-purchase side of this setup gets even stronger.
Automations can fire when an upsell is purchased, but only if you have configured them properly. The trigger to use is:
Order Submitted
Then apply a product filter so you can target a specific SKU or product.
That allows you to build workflows such as:
- Tagging customers based on the upsell they bought
- Sending onboarding emails for the new product
- Alerting your team internally
- Launching fulfillment sequences
For agencies, this is where funnel building connects directly into operational systems. It is not just about collecting more revenue at checkout. It is about feeding the right customer actions into your CRM and automation stack so fulfillment stays organized.
Supported payment gateways
HighLevel supports multiple payment gateways for this type of funnel setup, including:
- Stripe
- PayPal
- Authorize.net
- NMI
- Square
That flexibility helps whether you are building for your own business or managing HighLevel agency setup and scaling across different client use cases.
Best practices for better upsell performance
To keep your one click upsell funnels working smoothly, follow these practical guidelines:
- Keep the upsell relevant. It should naturally extend the original purchase.
- Use the same domain. Token transfer depends on it.
- Build in V2 funnels. This feature does not work in V1.
- Attach products correctly. The checkout product belongs in the form, the upsell product belongs on the upsell funnel step.
- Set the checkout button to go to the next step. This keeps the flow clean.
- Test inventory-sensitive offers. If inventory is depleted, the offer will not work.
- Connect automations. A purchase should trigger the right workflow and fulfillment actions.
Why this matters for agencies and SaaS operations
For anyone using GoHighLevel as more than just a page builder, this feature supports bigger operational goals too.
It helps agencies create more profitable client funnels. It supports cleaner CRM records because purchases stay tied to the customer journey. It improves marketing automation because every accepted offer can trigger a specific workflow. And it makes SaaS operations more scalable because the sales process becomes more systematic.
In other words, one click upsells are not just a conversion tactic. They are part of a stronger implementation strategy inside HighLevel.
If you are building systems for clients, this is the kind of small improvement that can create a noticeable lift in results without requiring more traffic or a complete funnel rebuild.
Final thoughts
One click upsells in HighLevel are one of the fastest ways to improve revenue per customer.
The setup is simple once you understand the flow:
- Create a checkout form using the Sell Product element
- Add that form to a V2 funnel
- Set the button to move to the next step
- Create an upsell page
- Attach the upsell product to that page
- Configure the button as a one-click up/downsell
- Finish with a thank you page and order confirmation
From there, you can chain more upsells, connect automations, and turn a basic checkout into a smarter revenue system inside HighLevel.
If you are still building this out, a HighLevel free trial is a practical place to start testing the flow. And if you want templates, implementation ideas, and extra support around funnel systems, workflows, and agency execution, the Nexus Hub community is worth exploring as a next step.
FAQ
Can I create one click upsells using HighLevel Forms instead of the standard funnel order form?
Yes. You can use the Sell Product element inside HighLevel Forms to collect payment details and generate the token needed for a one-click upsell. Then place that form inside a V2 funnel.
Do one click upsells work in V1 funnels?
No. This setup works with V2 funnels only.
Why does the upsell need to stay on the same domain?
The payment token created during the initial checkout must transfer to the next page. If you send the customer to a different domain, that token will not carry over correctly, which can break the one-click upsell flow.
What is the difference between a main product and a bump product in HighLevel?
The main product is the core offer being sold on the page. A bump product is a smaller add-on attached to the checkout experience. In the setup shown here, the initial offer is typically the main product.
Can I add more than one upsell in a HighLevel funnel?
Yes. Each funnel step supports one upsell product, so you can chain multiple funnel steps together to create a multi-step upsell sequence.
How do I trigger automations when someone buys an upsell?
Use the Order Submitted trigger in HighLevel workflows and apply a product filter to target the specific product or SKU tied to the upsell.
Which payment gateways are supported for this setup?
Supported gateways include Stripe, PayPal, Authorize.net, NMI, and Square.
Can I show customers everything they purchased on the thank you page?
Yes. Add the Order Confirmation element to the thank you page. It will display purchased products individually, including main products, upsells, and bump offers.
The Complete Operating System for Growth
Join over 60,000+ agencies and businesses using HighLevel to capture more leads and close more deals. Start your trial today and get instant access to the Nexus Hub resources.
Claim Your Free Trial & Bonuses